
How to Lay Unilock Brick Pavers for a Patio—Like a Pro (With Just a Dash of Sweat and Humor)

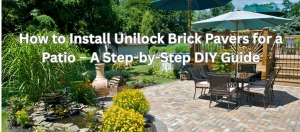
 So, you’ve finally decided it’s time to give that backyard the upgrade it deserves. You’re dreaming of lazy summer evenings on your new Unilock patio, grilling burgers and sipping something cold. But before you break out the grill, you’ve got to break out the shovel—because this isn’t just a backyard makeover, it’s a full-blown paver patio project. And guess what? With a little guidance (and maybe a strong cup of coffee), you can absolutely do this.
Here’s a step-by-step guide to laying Unilock brick pavers the right way—with fewer mistakes, more muscle, and a sprinkle of humor to get you through the heavy lifting.
Prep Work and Planning:
 Draw a plan view showing measurements and grade elevations. Everything you’ll need requires you to know the total square footage of your project – so measure and have that figure ready. Please check with your home owners association (HOA), city or village to see if a building permit and/or a drawing is required before you begin.
Mark out the location of the patio, walkway, or driveway. Call JULIE (811) and ask them to mark and locate any underground utilities before you dig.
Pro Tip: Before you spend your hard-earned money on this type of a home upgrade, be certain that you get what you want. If you live near-by a Unilock plant, they usually have an area outside called “The Idea Center”. There you can see the various types of brick in their color options and, they are displayed as they will be used. (ie. patios, retaining walls).
Step 1: Excavate Like You Mean It (Seriously, Dig Deep)
Before you even think about laying those gorgeous Unilock bricks, you’ve got to remove the top layer of existing soil, grass, weeds, and whatever else is lurking underfoot. For walkways and patios, excavate a minimum of 3″ wider than the area. This is to facilitate the securing of your paver edging later on. Aim to dig down about 7 to 9 inches below your desired finish grade. Why so deep – are we digging for gold? No. Because you’re making room for:
- 4 inches of compacted gravel base (CA6 or road mix)
- 1 inch of bedding sand (torpedo/coarse sand)
- 2¾ inches or so for the pavers themselves
Don’t skimp on the depth. Think of it as the foundation for a long-lasting relationship—with your patio.
Pro Tip: Have a plan for all that leftover dirt. Don’t just pile it behind the garage. Use it to level out low spots in your yard, raise garden beds, fill old tree stump holes, or offer it to your neighbors (who will suddenly stop answering your texts when they realize what you’re offering is 800 pounds of soil).
![Ensure Proper Pitch Away From Your House]() Step 2: Pitch Perfect – Drainage Is No Joke
Step 2: Pitch Perfect – Drainage Is No Joke
 Step 2: Pitch Perfect – Drainage Is No Joke
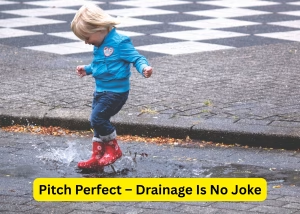
You don’t want your new patio turning into “Lake Backyard” every time it rains. That’s where “pitch” comes in.
Always slope the patio away from your house, ideally at 1/4 inch per foot. This ensures water runs off properly and doesn’t sneak into your basement or pool at your foundation. A simple string line and level (or laser level if you want to get fancy) will help guide the slope.
Pro Tip: Remember: Water follows gravity. Be smarter than water.
Step 3: Gravel – The Rock-Solid Foundation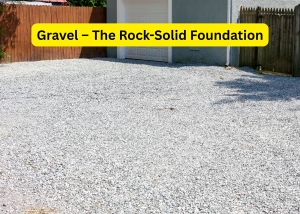
![Road Mix is Used to Create a Solid, Stable Base]()

Next up: CA6 also known as road mix (a blend of crushed gravel and limestone fines). This is the unsung hero of any great patio. Lay it down in 2-inch layers, compacting each layer with a plate compactor (minus the rubber pad). You need 4 inches minimum of compacted gravel.
Why compact it? Because if you don’t, the ground will settle over time—and your once level patio will look like it was built during an earthquake.
Pro Tip: Rent a plate compactor. It’s way more fun than it sounds. It’s like a mini vibration machine with purpose.
Step 4: Sand – The Bed Your Pavers Dream Of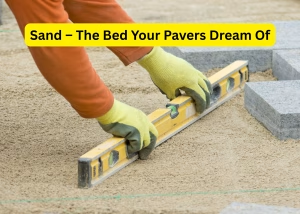
![Use Sand to Bed Your Pavers]()

After your gravel is compacted and sloped, it’s time to spread a 1-inch layer of coarse bedding sand (aka. torpedo sand). This allows you to fine-tune the level of each brick and provides a cushion for the pavers.
Use a screed board (such as a 2×4) and 1-inch PVC pipes to get a consistent depth. Place the pipes on the gravel base, pour sand between them, and run your board across the top like you’re frosting a very large, gritty cake. Then remove the pipes and fill in the gaps.
Pro Tip: Do NOT compact the sand before laying the pavers. That’s a rookie mistake—and we know you’re better than that.
Step 5: Lay the Pavers – Brick by Beautiful Brick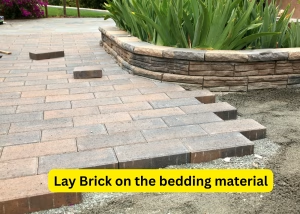
![Lay the Brick]()
Now comes the fun part: laying your Unilock pavers in your chosen pattern. Whether you’re going for herringbone, running bond, or something fancy with borders, make sure to:
- Start from a straight edge or 90-degree corner.
- Maintain consistent spacing (Unilock bricks typically come with built-in spacers).
- Use string lines to stay aligned.
- A “dead blow” mallet helps safely persuade each brick into its proper position.
You may need to cut pavers that don’t fit along edges or around objects. Mark the pavers and cut with a suitable masonry saw. A “dry cut” masonry saw or a tub-style “wet saw” works best. These can be rented from most local rental centers. (Always wear appropriate safety gear when cutting).
Once your pavers are laid, it’s time for the final compaction. BUT WAIT! Before you rev up that plate compactor again, attach the rubber pad or use a compactor designed for pavers. Otherwise, you’ll scratch or chip those beautiful bricks you just spent hours aligning.
Pro Tip: Don’t rush the compaction process. And use multiple passes in different directions over the entire area to insure a level surface.
Step 6: Keep It in Place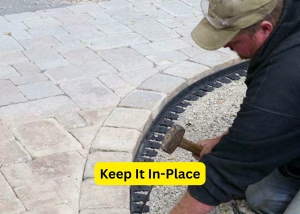
![Use Brick Edge to Hold the Pavers in Place]()

At this step add your brick edge. Edge restraints are a critical element to the durability of a paver installation. They prevent the pavers from moving and shifting over time. Plastic “snap edge” comes in rigid 8 ft. lengths and flexible 15 ft. lengths. They are best held in-place with 12″ spikes pounded into the compacted gravel.
Step 7: Joint Sand, The Secret to Long-Lasting Good Looks
Once the pavers are compacted, sweep polymeric sand into the joints. This is no ordinary sand—it’s got attitude. Polymeric sand hardens when activated with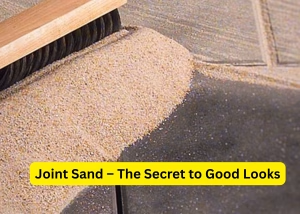
 water, locking your pavers in place and preventing:
- Weed growth
- Ant infestations
- Joint erosion during heavy rains
Standard joint sand? It’s fine… until it’s not. It washes out, weeds sneak in, and ants throw a rave in your joints.
Pro Tip: Go with polymeric sand. It’s worth the few extra bucks. And, it comes in several color options.
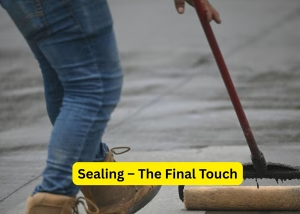
Step 8: Sealing – The Final Touch (Optional, But Worth Considering)
Sealing your patio is like waxing your car—it makes it look amazing and protects it, but it’s not mandatory. Here’s the breakdown:
Water-Based Sealer (Natural or Matte Finish):
- Low odor and low VOCs
- Water based
- Won’t dramatically change the color of your pavers
- Preserves the natural look
- Easier to apply and reapply over time
Solvent-Based Sealer (Wet Look):
- Brings out deep colors and gives that glossy “just rained” effect
- Provides strong protection against stains and UV fading
- Solvent Based
- Stronger smell and higher VOCs
Pro Tip: Don’t over apply the sealer. Today’s sealers have a “breathable” characteristic that permits excess moisture from under the brick to escape. Too much sealer blocks that ability and will result in a cloudy appearance on your bricks. You can apply the sealer with a pump sprayer or a 3/8″ nap paint roller approved for “All Paints”.
Final Thoughts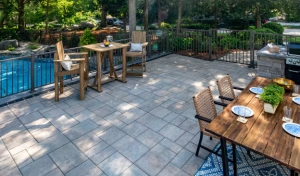
![Done! Enjoy Your New Patio]()
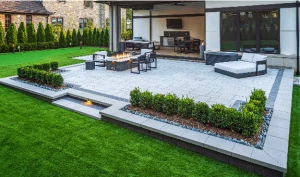
Installing Unilock pavers isn’t just a weekend project, it’s a statement. Done right, it will last for decades and boost your home’s value and curb appeal in a big way. Sure, it’s a little labor-intensive, but with careful prep, the right materials, and a bit of patience, you’ll end up with a patio that’s the envy of the neighborhood (and the perfect excuse to host a backyard BBQ). Now get out there and build something great. Just don’t forget sunscreen, hydration, and maybe a massage appointment for the day after!
Need help sourcing quality bedding sand, CA6 gravel, or even a consultation on which Unilock pavers best match your outdoor vision? Visit Tim Wallace Landscape Supply—where outdoor dreams begin.