
Let’s Get Your Snow Plow Ready for the Season

Keeping your snowplow ready during the winter plowing season is crucial for effective snow removal. Here are some steps to help you prepare and maintain your snowplow. This article was written with Western plow owners in mind. But many of these points will apply to any brand snowplow. So let’s get your snow plow ready for the season.
Before you connect your plow to your truck, check the operation the truck’s headlights. Are the daytime running lights, turn signals, dim and bright lights operational? By checking beforehand, you’ll know if the plow connection is the source of any plow / truck light issues.
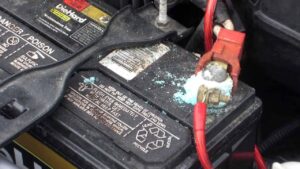
While you’re at it, open the hood and give a serious look at your battery. You’re looking for corrosion, loose terminal connections and any poor connections that are plow specific. (ie. main in-line fuse and on some trucks the wiring to the under hood solenoid if yours is there). Clean and tighten as needed. If you can’t remember when you last installed a new battery, it may be time to do so. Your truck’s battery will need to be in tip-top shape to get you through the plow season. And, don’t forget that it’s your alternator that resupplies the battery. When in doubt, swap it out.
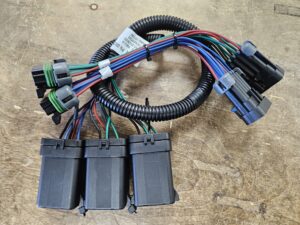 Check also any plow-specific cables under the hood. Often times they simply need a cable tie to put them back into a safe place. If your plow was installed by a factory authorized dealer this should not be an issue – but, look at any plow-specific cables that have “boxes” hanging off the ends. Inside are important relays that will fail if they do not receive an adequate air flow to keep them cool. Many DYI installers make the mistake of leaving these relays too close to the engine and at some point, they fail from over-heating.
Often overlooked are the front grill and coolant system. Plowing places a great deal of stress on both the truck and the engine. Be sure that the grill is clean and free of any debris from the summer season that might block air-flow to the motor and radiator. Look for signs of cracking or leaks on rubber coolant lines. Replace or repair and add coolant as needed. (The same applies to your transmission system.) And, if you took the plow receivers off the truck mount after the last plow season, put them back on and don’t forget to secure them with the proper cotter pins.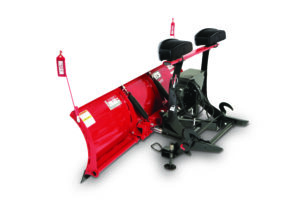
Turn your attention now to your snowplow – but do these simple visual checks before you connect plow to truck. Needless to say, but how and where you stored the plow over the summer will have a lot to do with the condition you find it in. Look at your plow with a “fresh set of eyes”. In other words, things that you may have continuously overlooked previously now should be noticed – and if necessary, addressed.
Visually inspect the mold board (blade) for any damage or wear and tear that will adversely affect the safe and effective operation of the unit. Winged plows that are rusting through at the blade, hinge joints or slide box will only get worse this season. Also, check for the proper tightness of your blade’s trip springs including the attachment eye bolts and nuts. If your plow has shock absorbers, check them as well.
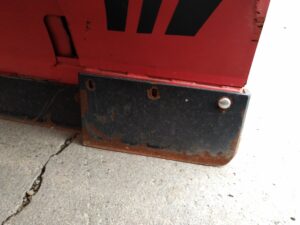
Make sure the plow’s cutting edge is sharp to cut through snow effectively. Monitor wear and replace the cutting edge before you get to the base angle that protects the blade of your plow, as uneven wear can negatively impact performance. Look at the edge’s bolts. Missing bolts or non-OEM bolts that you had to put on in a pinch last season should be changed out.
Remember, the first part of your plow that is going to wear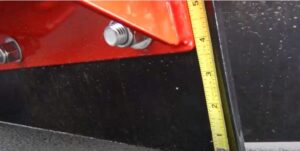 down is the cutting edge. If the edge is allowed to wear all the way through it can damage the actual moldboard (blade), which eventually will result in the need to replace the entire plow instead of just the cutting edge. Simple reasoning tells us that whatever parts of your plow come in contact with the pavement is going to wear down first. This also goes for blade shoes if you’re using them for plowing over gravel surfaces.
Next, visually check your hydraulic hoses, fittings, and cylinders for leaks or damage. (More on hydraulics later.) Try tightening each hose fitting as they often loosen during the plow season. And, you can count on dry, cracked hydraulic hoses to fail you when you need them the most. Again, when in doubt – swap them out.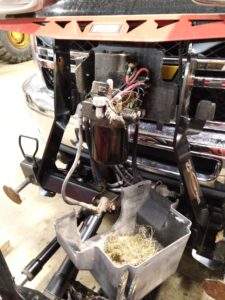
 Visually check all electrical connections and wiring. Plow wiring tends to fail first where it’s subject to bends and crimping. If your plow has one, open or remove the hydraulic cover. We’ve seen our share of mouse nests there and the subsequent damage that is caused. If you find the remnants of a nest, look especially closely at the wiring there. If chewed – remove and replace the harness.
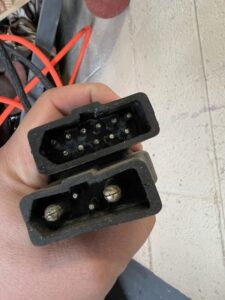
 Remove the plow’s connection plugs from the protective storage cover (please don’t tell me you don’t use it) and look inside each plug. Check the condition of any pins within the plugs. If any are broken or bent and loose you’ll need to replace the harness. If the plug is full of green corrosion or left over salt (shame on you), thoroughly clean it out. Brake cleaner spray can help. And then, (here’s a “no-brainer” way to save hundreds if not thousands of dollars in unnecessary repairs) apply a generous amount of di-electric grease to the inside of the plugs. (You will probably need to re-apply the di-electric grease again if your plow is not left on for the entire season.)
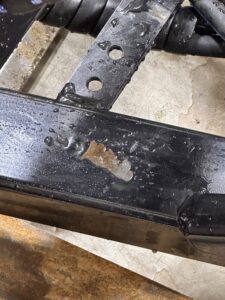
The black iron portion of your plow (often referred to as the “big box”) has a number of parts that should be closely examined. Rather than detail each and every component, it’s safe to say that a sincere visual check of 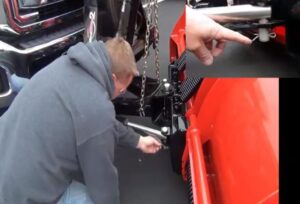 everything you haven’t already looked at is given a good once over. You’re looking for missing cotters, missing bolts, worn or rounded out frame penetrations, (ie. pivot bolt, pivot bar) slack in the lift chains, lose or missing mounting nuts / bolts for your plow lights, etc. If the black iron has missing paint and /or rust spots, it’s a good idea to clean, prime and re-paint with an OEM paint. Again, these little things become big, expensive things when left unaddressed.
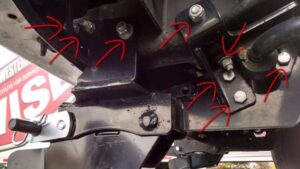
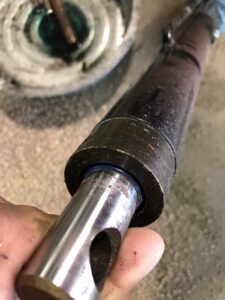 Visually check all the places where the lift and angle rams are connected to the black iron and then to the blade quadrant. You’re looking for missing ram pins, securing cotter pins and washers that will allow these parts to become disconnected from the frame. A 97 cent cotter pin can save you hundreds of dollars in repairs and the replacement cost of angle or lift rams. If you find pitting of the chrome push rod with a ram or a bent push rod on a ram, consider changing it out.
 While you’re at it, lubricate moving parts such as pivot points, pins, and springs with appropriate lubricants to prevent rust and ensure smooth operation. Protect and maintain bearings, hinges and pivot bolts with WESTERN® Extreme Defense™ Grease, specifically designed for cold, wet and dirty environments.
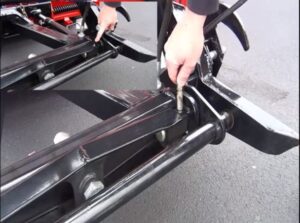
Last but not least, look carefully at the stand assemblies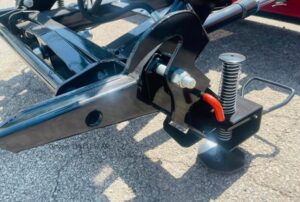 and the stand shoes mechanisms – which are the parts that rest on the ground when your plow is not connected to the truck. Stand shoe pins can become bent as can the hooks that engage with your receivers. If all these things look good – it’s time to connect plow to truck.
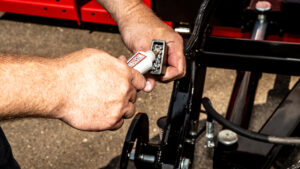
With Western Ultramount and Ultramount 2 system connecting plow to truck is a snap – no tools required. Once you have connected the plow to the truck – connect your 2 or 3 truckside and plowside electrical plugs. As stated previously, clean out any corrosion or left over salt beforehand and add a generous amount of di-electric grease to both the male and female plugs.
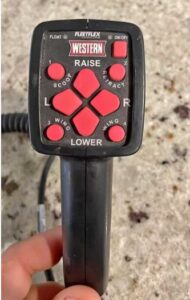 Reconnect your controller to the control harness inside the cab. Remember, your controller will not power on unless the plow and its plugs are connected to your truck. Start your truck, power ON your controller and run the plow through its basic operational positions – up, down, left, right. If you have a “hinged” plow (V-plow, Wide-Out, Prodigy) check the operation of each of the specific functions of your plow. (Scoop, wing extended, retracted, etc.) Obviously, if you notice any operational problems, be sure to look into them ASAP. Rust and corrosion often limits the ease of movement of the hinge joints and slide-boxes of the multi-position plows. Sometimes simply knocking off the rust or corrosion is enough to return full operation.
One common area that can cause operational issues is your plow’s hydraulic system. Since there are so many variations on how to check, drain and refill your hydraulic fluid, it’s best to check with your Owner’s Manual for all the details. If you can’t find it, you can access the on-line version at: https://westernplows.com/publications-library/
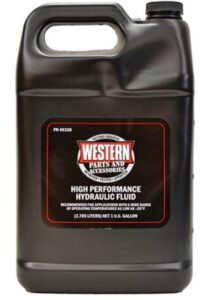 Western recommends that you replace the hydraulic fluid and filter at the start of the season. Fluid does get old and loses its viscosity over time. Yes, water can infiltrate your closed hydraulic system via condensation and through bad wiper seals on lift and angle rams. Water in the fluid = ice in cold weather = poor plow performance. This is especially true of older Western Unimount systems. Again, we recommend changing your fluid and filter at the start of each plowing season.
Pulling the fluid reservoir off once the oil has been drained from the system is a good idea. Inside the unit is a small magnet that is designed to hold onto any metal shavings that are flowing through the hydraulic system. Little or no shavings is a good thing. A magnet covered with shavings that you have to remove indicates damage occurring to ram pistons or other moving metal parts. These buggers will clog your hydraulic fluid filter and damage the hydraulic pump which will reduce the plows efficiency. Did you hit something really hard with the plow last season? If so, don’t be surprised if you find these little metal shavings. If you find this, try to determine where they’re coming from and correct that issue. And since you pulled the reservoir off, replace the O-ring with a new one. Simply lube it with a touch of hydraulic fluid before you secure it back into place.
And as an aside, stick with the hydraulic fluid. Automatic transmission fluids (ATFs) are less viscous and designed to work under lower pressures and temperatures than hydraulic fluids. The operating temperature range of hydraulic fluids is larger so they maintain their viscosity better in a broader temperature range. Also hydraulic fluids are very pure compared to ATFs.
By this point your plow should be prepped and ready for service. Now is a good time to run through a few “what ifs”:
- What if the plow won’t lift off the pavement? Do I know how to “short chain” the plow if it won’t lift or if a ram breaks?
- What if I blow a hydraulic hose in the middle of a snow storm? Do I have an Emergency Kit with
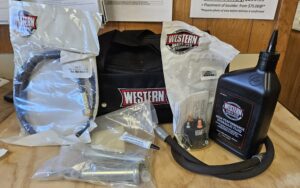
![]() a replacement? Do I have a spare quart of fluid with a fill spout? Do I know where to add the fluid? (If you’ve done everything suggested in this article, the answer is “Yes”!) FYI: Western sells several pre-made Emergency Kits with parts specific to a Unimount, Fleet Flex or non-FF plow.
a replacement? Do I have a spare quart of fluid with a fill spout? Do I know where to add the fluid? (If you’ve done everything suggested in this article, the answer is “Yes”!) FYI: Western sells several pre-made Emergency Kits with parts specific to a Unimount, Fleet Flex or non-FF plow. - What if the solenoid fails? Do I know where it’s located on my plow? Do I have the PROPER spare in my Emergency Kit? (Please don’t use a Fleet Flex solenoid on a non-Fleet Flex 3 plug or relay system plow – or vice versa. Trust me, it matters.)
Throughout the season, periodically inspect and maintain your plow to catch issues early and prevent breakdowns. Always follow the maintenance guidelines provided by the plow’s manufacturer.
By following these steps and conducting regular maintenance, you can ensure that your snowplow is ready to tackle winter’s challenges effectively. And keep in mind, we’re an authorized Western dealer. For Western snow and ice control equipment sales, parts, service and installation, you can count on Tim Wallace Landscape Supply. 630.759.5552
